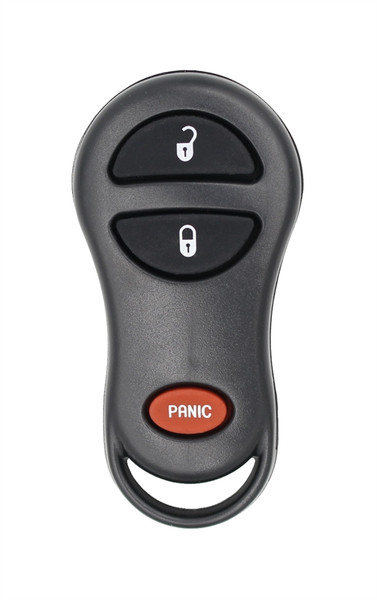
This is a new aftermarket replacement key fob compatible with Jeep models listed below. This product meets our quality standards and is guaranteed to work the same as an original.
- 1999-2004 Jeep Cherokee
- 1999-2004 Jeep Grand Cherokee
NOTE: 96-98 Jeep Grand Cherokee require professional programming by an automotive locksmith or dealership.
Obtain all remote transmitters for this vehicle.
1. Identify the programming connector. It will be located in the upper edge of the passenger side cowl trim panel. The programming connector will be a single dark green wire with a red moulded connector on the end of it.
2. Using a suitable jumper wire jump the programming connector to ground. This means contact one end of the wire to the connector and the other end to a non-painted metal surface.
3. Insert key into ignition and turn ignition switch to the ON position.
4. Press any button on the first remote to be programmed. To confirm successful programming the door locks will Lock and then Unlock automatically. Repeat this step for any additional remotes that you want programmed to this vehicle.
5. Remove jumper wire and turn ignition off. Test remotes to ensure proper programming.
YOU MUST HAVE A WORKING REMOTE FOR THIS PROCEDURE TO WORK. IF YOU DON'T HAVE A WORKING REMOTE THEN YOU MUST HAVE A REMOTE PROGRAMMED BY A DEALER OR LOCKSMITH USING DIAGNOSTIC EQUIPMENT.
PLEASE READ ENTIRE PROCEDURE BEFORE PERFORMING. SOME VEHICLES MAY USE ONE OF TWO PROCEDURES. IF PROCEDURE 1. DOES NOT WORK THEN PLEASE USE PROCEDURE 2.
Programming procedure #1.
Obtain all remote transmitters for this vehicle.
1. Put key in ignition and turn ignition switch to ON position (as far as you can turn key without cranking engine).
2. Press and hold UNLOCK on a currently functioning remote for 4 to 10 seconds.
3. While holding the UNLOCK button during the 4 to 10 second period, press the panic button for one second and release both buttons at the same time. A chime should sound within three seconds to indicate the vehicle has entered programming mode.
4. Press any button on the remote used in step 3. You should hear an audible tone indicating that remote has been re-programmed. This step must be done within 30 seconds of hearing first chime in step 3.
5. Within 30 seconds of completiong step 4. press any button on the next remote. Repeat step 5. for all additional remotes including working remotes.
6. Programming is now complete. Turn ignition off and test remotes to ensure proper programming.
Programming Procedure #2
Obtain all remote transmitters for this vehicle.
1. Put key in ignition and turn ignition switch to ON position (as far as you can turn key without cranking engine).
2. Press and hold UNLOCK on a currently functioning remote for 4 to 10 seconds.
3. While holding the UNLOCK button during the 4 to 10 second period, press the panic button for one second and release both buttons at the same time. A chime should sound within three seconds to indicate the vehicle has entered programming mode.
4. Press the LOCK and UNLOCK buttons simultaneously on the same remote used in step 3. then release. You should hear an audible tone indicating that the remote was recognized. Once tone is heard press and release the UNLOCK button on that remote. A chime should sound indicating that the remote has been programmed. This must be done within 30 seconds of step 3.
5. Within 30 seconds of completing step 4. press the LOCK and UNLOCK button on the next remote then release. You should hear an audible tone indicating that the remote was recognized. Once tone is heard press and release the UNLOCK button on that remote. A chime should sound indicating that the remote has been programmed. Repeat step 5. for all additional remotes including working remotes.
6. Programming is now complete. Turn ignition off and test remotes to ensure proper programming.
An aftermarket remote or key is a product that is not associated with the brand of your vehicle. Because of this, they tend to be a bit cheaper than remotes and keys that come from your vehicle's manufacturer.
An aftermarket product will still sync up to your vehicle and work just like a regular remote or key, it just won't have your vehicle's logo.


